Preparation
1. Make sure that the model is correct and slewing bearing isn’t damaged during transportation.
2. Check the appearance and rotational state of the bearing, such as rotational precision clearance, rotating flexibility, seals position, lubrication grease etc.
3. The installation datum plane and bracket installing plane should be clean, grease, burr, paint and other foreign body should be wiped off.
Installation:
1. The screws in the installing plane should be fit with the mounting holes in the slewing bearing
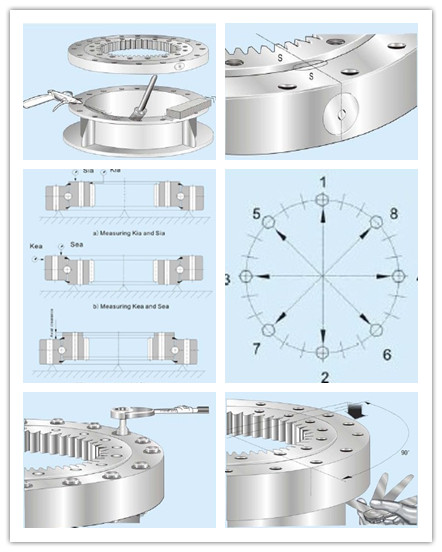
2. The slewing bearing has a soft zone marked with an "s" on the upper surface, when installing the bearing, it is important to ensure that this area is placed in a non-load or infrequent load zone.
3. When the bearing is placed on the supporting frame work it is important to check the interface between these two surfaces. This check should be carried out with the insertion of feel gauges between the two surfaces. If a gap should exist then it is recommended to plane/resurface the effective area so as to remove the gap.
4. Install slewing bearing with high strength screws, and choose appropriate strength bolts. All bolts are required to be tightened evenly. The sequence of this tightening process is shown in Pic. Welding of bearing is not allowed, in the event of welding any adjacent parts, heat transfer shall be avoided so as to cause the bearing to become deformed or change the hardness.
5. After installation, the bearing should be rotated to check for smooth operation and any emission of unusual noise. If either of the aforementioned are noted, then the bearing should be adjusted to eliminate them. The teeth of the largest run-out are coated with green paint.


